Hello,
This is a short article I published on another forum a couple years ago. A Facebook acquaintance asked me about shield painting, and the old article no longer linked images, so I decided to post it here.
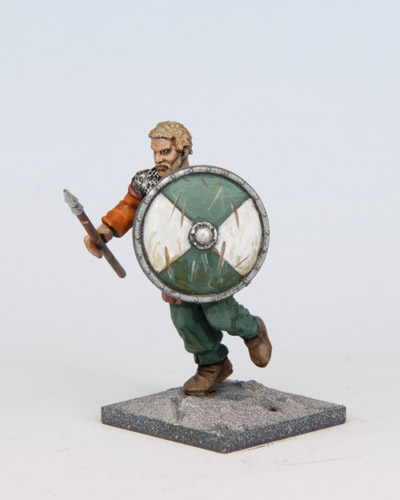
1. This tutorial starts with a mostly finished Wargames Factory Saxon Thegn warrior- I typically save the shield for last. My priming technique is to spray dark from below, lighter from above. I use white, gray, black, and/or red-brown 'Dupli-Color' Automotive primer for generic painting, picking colors based on the overall color of the finished model. At this point there is a thin black lining of the rim, the rim was painted gunmetal, followed by a thin black wash again to reinforce the rivets.
2.
I apply the base tones, slightly darker than what I want in the end. If
you want a weathered and beaten shield, it is okay (and maybe even a
good idea) to leave the base coat a little patchy. In this case I used
Games Workshop ‘Deneb Stone’ mixed with white (about 50/50) and Games
Workshop ‘Knarlock Green’ with a touch of ‘Orkhide’. When laying out the
design, be aware of the rivets- they serve as a useful guide for
dividing the round surface equally.
3.
I added a little more white to the ‘Deneb Stone’ and a little of the
‘Deneb Stone/white’ mix to the green. I think it looks good to leave a
hint of line where the colors meet.
4. For tears in the leather cover, I paint on a medium to dark brown. I think this was a Ceramcoat “Burnt Umber’ but any darkish brown will do.
5.
I paint a sliver of light brown over the dark brown cuts, trying not to
cover them up completely. It is okay if you miss on a couple, or put
the lines adjacent rather than overlapping.
6. With a lighter layer of the color used for the shield colors, paint a thin highlight next to a few of the rents.
7.
Lastly I create a dirty or stained layer using brown paint thinned with
water or a purpose made transparent wash. In this case I used a Secret
Weapon wash, ‘Dark Sepia’. At this point I often add a little of the
thin stain color to the lower legs and shoes.
Thanks for looking!